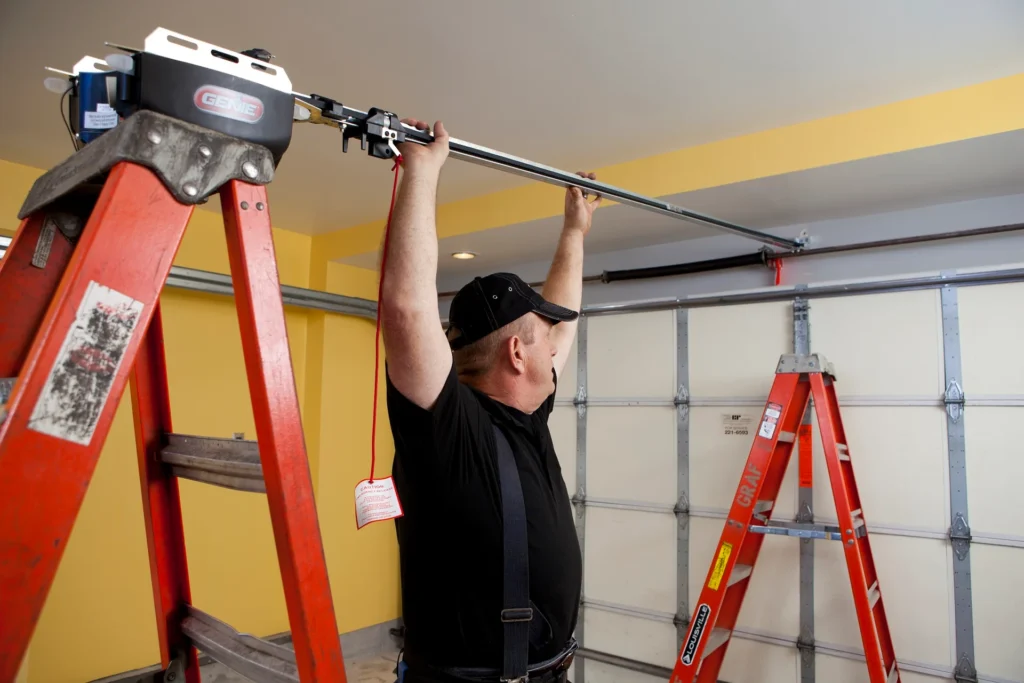

Installing a garage door opener might seem like a straightforward weekend project. After all, how hard can it be to mount a motor, connect a few brackets, and press a button? The truth is, many homeowners underestimate the process. A single mistake during garage door opener installation can lead to noisy operation, frequent breakdowns, poor security, or even serious safety risks.
I’ve seen perfectly good garage door systems fail—not because the equipment was low quality, but because the installation was rushed or important steps were skipped. Whether you’re handling the project yourself or hiring a professional, understanding the most common mistakes can save you time, money, and frustration.
In this guide, we’ll walk through the seven biggest garage door opener installation mistakes you should avoid. You’ll also learn practical tips to ensure your automatic garage door operates smoothly for years to come.
Why Proper Garage Door Opener Installation Matters
A garage door opener is more than just a convenience. It plays a critical role in your home’s security, accessibility, and daily routine. When installed correctly, it delivers:
- Quiet and reliable operation
- Improved home security
- Longer equipment lifespan
- Better energy efficiency
- Reduced maintenance costs
- Safe operation for family members and pets
On the other hand, poor garage door opener installation can create ongoing problems that become expensive to fix.
1. Choosing the Wrong Garage Door Opener
One of the biggest mistakes happens before the installation even begins.
Not every garage door opener is designed for every type of garage door. Heavy wooden doors require more lifting power than lightweight aluminum doors. Likewise, insulated steel doors have different requirements than single-panel models.
Consider These Factors Before Buying
| Factor | Why It Matters |
|---|---|
| Door weight | Determines required horsepower |
| Door size | Larger doors need stronger motors |
| Drive type | Chain, belt, screw, or direct drive |
| Noise level | Belt drives operate more quietly |
| Smart features | Wi-Fi, smartphone control, and remote monitoring |
| Battery backup | Keeps the opener working during power outages |
Selecting the correct opener prevents unnecessary strain on the motor and improves long-term reliability.
Tip
Always verify compatibility with your garage door manufacturer before purchasing an opener.
2. Ignoring Garage Door Balance
Many homeowners focus entirely on the opener while forgetting that the garage door itself must be balanced.
A garage door opener is designed to guide the door—not carry its full weight.
If the torsion springs or extension springs are worn, the opener works much harder than intended. This often causes premature motor failure and damaged gears.
Signs Your Door Isn’t Balanced
- Door feels unusually heavy
- Door falls quickly when opened halfway manually
- Uneven movement
- Jerking during operation
- Loud grinding or popping sounds
Before beginning any garage door opener installation, disconnect the opener and test the door manually. It should stay in place when opened halfway.
If it doesn’t, spring adjustment should be handled by a trained technician due to the extreme tension involved.
3. Incorrect Rail and Bracket Alignment
Even the highest-quality garage door opener won’t perform well if the rail isn’t installed correctly.
A crooked rail causes unnecessary friction. Over time, this creates excessive wear on the trolley, chain, belt, and motor.
Common Alignment Mistakes
- Crooked header bracket
- Uneven ceiling supports
- Loose mounting hardware
- Bent rail sections
- Incorrect spacing between brackets
Take time to measure everything carefully before tightening bolts permanently.
Installation Checklist
- Use a level throughout installation.
- Double-check measurements.
- Tighten all mounting bolts securely.
- Follow the manufacturer’s installation instructions.
- Confirm rail alignment from multiple angles.
Proper alignment dramatically improves smooth operation.
4. Setting Travel Limits and Force Incorrectly
This mistake is surprisingly common.
Modern garage door openers include adjustable travel limits and force settings. These determine how far the door opens and closes, along with how much pressure the motor uses.
If these settings aren’t adjusted correctly, several problems may occur:
- Door won’t fully close.
- Door reverses unexpectedly.
- Door slams shut.
- Opener strains during operation.
- Increased wear on mechanical components.
Why Force Settings Matter
Force settings are directly connected to garage door safety.
If the closing force is too high, the opener may fail to reverse when it encounters an obstacle.
That increases the risk of injury or property damage.
After every garage door opener installation, test the safety reversal system according to the manufacturer’s recommendations.
5. Skipping Safety Sensor Installation
Garage door safety sensors are not optional.
They are essential components designed to prevent the door from closing on people, pets, bicycles, or vehicles.
Unfortunately, some DIY installers mount them too high, misalign them, or forget them entirely.
Proper Sensor Placement
Generally, safety sensors should be positioned several inches above the garage floor and aligned directly across from one another.
Watch for:
- Dirty sensor lenses
- Loose wiring
- Sunlight interference
- Misalignment
- Damaged brackets
Whenever your garage door refuses to close properly, the sensors are often the first place to inspect.
Safety Tips
- Keep sensors clean.
- Never bypass them.
- Check alignment regularly.
- Test monthly using a small object placed beneath the door.
Ignoring these devices creates unnecessary safety hazards.
6. Poor Electrical Connections
Electrical mistakes don’t always show up immediately.
Sometimes everything appears to work perfectly—until weeks later when intermittent failures begin.
Improper wiring may cause:
- Motor shutdowns
- Remote control failures
- Power interruptions
- Blown circuit breakers
- Damaged control boards
During garage door opener installation, follow all electrical requirements carefully.
Electrical Best Practices
- Use the recommended outlet.
- Avoid extension cords.
- Secure all wire connections.
- Protect low-voltage wiring.
- Keep wires away from moving parts.
- Check voltage compatibility.
If electrical work exceeds your experience level, hiring a licensed electrician is often the safest choice.
7. Forgetting Routine Testing After Installation
Many people celebrate once the opener is installed and working.
However, the job isn’t truly finished until everything has been thoroughly tested.
A complete post-installation inspection catches small issues before they become expensive repairs.
Test Every Feature
After garage door opener installation, verify:
- Manual release works
- Remote controls respond consistently
- Wall control functions properly
- Safety sensors reverse correctly
- Auto-reverse activates with resistance
- Door opens smoothly
- Door closes evenly
- No unusual vibrations
- Quiet operation
- Smart home integration (if available)
Spending ten extra minutes testing every function can prevent years of frustration.
Additional Tips for a Successful Garage Door Opener Installation
Beyond avoiding the major mistakes, a few simple habits make a noticeable difference.
Read the Manual Completely
Even experienced DIY enthusiasts benefit from reviewing manufacturer instructions.
Different brands have different mounting systems, programming methods, and adjustment procedures.
Use Quality Hardware
Cheap anchors or undersized lag screws can loosen over time.
Investing in quality fasteners improves long-term stability.
Lubricate Moving Parts
Proper lubrication helps reduce friction.
Focus on:
- Rollers
- Hinges
- Bearings
- Springs (where recommended)
- Chain or screw drive (if specified)
Avoid over-lubricating, as excess grease attracts dust and debris.
Keep the Tracks Clean
Dirt buildup increases resistance.
Regular cleaning helps maintain smooth door travel without placing unnecessary stress on the opener.
Common Warning Signs Something Was Installed Incorrectly
Even if the opener appears functional, these symptoms often point to installation issues.
- Excessive vibration
- Loud grinding noises
- Uneven opening speed
- Door reversing unexpectedly
- Slow response from remote controls
- Crooked door movement
- Motor overheating
- Chain sagging
- Belt slipping
- Loose brackets
- Flashing sensor lights
Address these warning signs early before they lead to larger repairs.
DIY vs Professional Installation
Many homeowners wonder whether they should install the opener themselves.
Here’s a simple comparison.
| DIY Installation | Professional Installation |
| Lower upfront cost | Higher initial investment |
| Requires tools and experience | Expert installation |
| Takes several hours | Usually completed quickly |
| Greater risk of mistakes | Reduced installation errors |
| Learning experience | Warranty-friendly installation |
| Personal satisfaction | Long-term peace of mind |
If you’re comfortable using power tools, carefully following instructions, and performing mechanical work, DIY installation can be successful.
However, for heavier doors, complicated systems, or smart garage door openers, professional installation often proves worthwhile.
Garage Door Opener Maintenance After Installation
Even perfect garage door opener installation won’t eliminate the need for maintenance.
A few simple habits extend the life of your entire garage door system.
Monthly Maintenance Checklist
- Inspect cables
- Tighten loose hardware
- Test safety sensors
- Check door balance
- Listen for unusual sounds
- Lubricate moving parts
- Clean tracks
- Test battery backup
- Inspect weather stripping
- Verify remote batteries
Preventive maintenance is almost always less expensive than emergency repairs.
Conclusion
A successful garage door opener installation isn’t just about mounting a motor to the ceiling. It requires careful planning, accurate measurements, proper alignment, safe electrical connections, and thorough testing. Skipping even one important step can lead to expensive repairs, reduced performance, or avoidable safety hazards.